Monday, October 29, 2012

Anzac biscuit recipe

Anzac biscuit recipe

The other night I did some baking and posted a photo of some ANZAC biscuits on Instagram and immediately got asked to blog the recipe.  It's a recipe that if you are Australian, you probably know by heart and have been making since you were 8. This is the way I've been making them for years. Enjoy!


Anzac biscuit recipe

The original ANZACs were the young men of the Australian and New Zealand Army Corps in World War 1. My grandad, Harold, (my mum's father) was at both Gallipoli and Ypres as a young ambulance man. He was too young to sign up as a soldier and and even too young to sign up as a medic but his parents were French so they let him lie about his age so he could go and help their countrymen.  Grandad turned 21 on the 11th of November 1918 - Armistice Day or V Day. What an amazing twenty first birthday present! On this day every year in Australia, we have two minutes silence and as well as thinking of fallen soldiers I always send a little prayer to my Grandad who managed to survive WW1 with just a big leg wound where he was hit with shrapnel and made it home to Australia to live a long ling life dying at the grand old age of 84.  Anyway on to the biscuits...

The wives of the ANZACs made these biscuits to send to their husbands on the battlefields for extra nutrition. The ingredients of ANZAC biscuits were chosen  because they would be able to withstand the long sea journey that the biscuits had to make to reach the troops.   Eggs, a very common binding agent used for other biscuits, were purposely not used because of the high likelihood that they would spoil before they reached Gallipoli or the Western Front in Europe.


Anzac biscuit recipe

How to bake ANZAC biscuits

125g butter, chopped coarsely
1 tablespoon golden syrup
1 ½ teaspoons bicarbonate of soda
2 tablespoons boiling water
1 cup (90g) rolled oats
3/4 cup (70g) desiccated coconut
1 cup (150g) plain flour
1 cup (220g) sugar*


Preheat oven to 160°C (or 140°C fan-forced)

Combine rolled oats, flour, sugar and coconut into a large bowl.

Combine butter and syrup in a small saucepan and heat gently until it all melts.

Combine bicarbonate of soda and hot water in a small bowl and then stir into the warm butter mixture. The mixture will all froth up. Pour this frothy mixture over your dry ingredients and mix well.

Spoon dessert-spoonfuls of your mixture onto a greased baking tray, allowing room for spreading. You can flatten them slightly if you want but it’s not really necessary.

Bake in preheated oven for 15 minutes or until golden brown*

Remove from oven and cool 5 minutes on baking trays; transfer to a wire rack to finish cooling.

Recipe Notes – I always make a double batch as we all end up eating some of the raw biscuit mixture which is delicious and then once cooked these biscuits get eaten up in a flash.  I use white sugar but you can also use brown, raw or castor sugar. I like my Anzac biscuits to be chewy but if you prefer them crunchy then just cook for slightly longer.


Anzac biscuit recipe
Milk bottle and straw

Do you love these? What's way is your favourite - crunchy or chewy?

Fiona xx


Anzac biscuit recipe

sharing at Homemakeronadime

Thursday, October 25, 2012

change of scene

For the next month I'll be looking at this view 


(well occasionally I'll be looking out the window when I'm not looking at spreadsheets and project plans on my computer)

rather than my standard view of this


I'm on an exciting contract full time for the next month in the city and am swapping my paint splattered clothes and furniture painting for high heels and project management. The kids are in after school care and our household will probably be limping along for the next little while. But I think we'll manage just fine. Workwise, yesterday was a bit of a baptism of fire but it's all good.

As they say a change is as good as a holiday. I love an exciting life! LOL.

I'll still be blogging as much as I can so bear with me.

Fiona xx


Wednesday, October 24, 2012

Halloween Cake Ideas

simple Halloween cake decoration ideas

Halloween is slowly gaining popularity in Australia. In our little suburb of Lilyfield it has really taken on and trick or treating is all the rage. All the kids wander around our quiet streets filling up on lollies and a lot of the houses are decorated in a spooky theme. Nothing like you see in America but fun all the same.  I thought I'd share some cakes I made a several years ago for a Spooky Halloween birthday party for my daughter and 3 of her friends - amongst the 4 kids there were about 90 kids and 80 adults invited so we needed some big birthday cakes.  

These were simple to make but look effective.


simple Halloween cake decoration ideas

The bat cake is a simple chocolate cake made in a large tin. My tin is 40 cm diameter and requires a triple cake recipe.  My simple chocolate cake recipe is a hit for birthday cakes and one of those super easy recipes that is throw all the ingredients in one bowl and mix. You can't get simpler than that! 


Once the cake was baked and cooled, I wrapped it in plastic and put it in the freezer for a few hours so it was firm but not completely frozen. I then cut out the cake to make it into a bat shape. Just a couple of triangular shapes around the feet and head. While the cake was still partly frozen I iced it with chocolate butter cream and piped on the bones in the wings and face detail. You can probably do a better job than I did as the face looks a little funny but the kids all loved it anyway.


simple Halloween cake decoration ideas


The witch cake was a vanilla cake and I iced it with bright blue butter cream for a wintry sky and then added details with black and white fondant icing. I made my own black fondant which is a complete nightmare and waste of time, It takes days and days and loads of black paste. Next time I would just go and buy ready made black fondant. In Australia most good cake shops and providors have ready made black fondant and it lasts ages.  I used a little metal push though cutter for the stars and cookie cutters for the bats and witch.  I always dust the cutters in icing sugar to ensure the fondant doesn't stick and pops out easily.  For the moon I just cut around a little plate.  To stick the fondant onto the butter cream you brush the back of the shape with a little water and lay down firmly.  If any icing sugar remains on the black fondant you can just brush it with a tiny bit of water.

simple Halloween cake decoration ideas

The kids loved these cakes and they added to the spooky feel for our party.

simple Halloween cake decoration ideas

 Enjoy

Fiona xx

sharing at Homemakeronadime


Tuesday, October 23, 2012

Just outside your back door...

Here is another post from my wonderful dad. Dad has always been a great gardener and is such an outdoors man. The original boy scout!  He has a wealth of gardening and pest control knowledge so I thought let him share some more of it here.


Growing herbs in pots and planters for easy use

Hi to all of Fi's readers,

Thank you for all the kind response to my post on getting rid of scale on lemon trees. Fi has asked me to share some more of my entomological and gardening knowledge on her blog. I hope you enjoy this series.

Not having any soil on your house block can restrict your gardening but can be compensated by creating above ground garden beds and using pots right near your back door to have herbs and salad greens readily on hand. 


Growing herbs in pots and planters for easy use

We live on quite a steep rocky slope surrounded by bushland near beautiful Wiseman's Ferry and so a large flat vegetable and herb garden isn't possible. To overcome this, I have built a couple of planter boxes right outside our back door. Four or five levels of treated pine can be used to form a planter box which can be filled with compost and sown to a range of salad greens, herbs and quick growing vegetables.  A trellis at the back can be used for climbing peas or beans.


Growing herbs in pots and planters for easy use

On the up-hill side I have lots of pots on shelves in the retainer wall.  Pots of various sizes can be arranged on shelves or ledges at ascending heights to make the most of a small area.  They are ideal for herbs such as chives, thyme, parsley, mint, sage, rosemary and basil.  Even a pot with several endive or rocket seedlings can produce leaves for many months.

Growing herbs in pots and planters for easy use

Regular fertilising and watering every two to three days are important.  When a leafy crop finishes, you can quickly replant with another so that there is a continuous supply throughout the year.


We also grow climbing peas and beans on the trellis in the planter or on stakes in another planter as you can see in the photo below.  These are Telephone variety peas and packets of seeds are available in nurseries or Bunnings.  The growing advice on the back of the packet is all you need to know!  It it so rewarding to pick the young pods for inclusion in salads or stir fries, or wait for the pods to fill out and shell out the fresh peas for cooking.  Climbing beans can also be grown this way.

Growing herbs in pots and planters for easy use

The photo below shows chocolate mint plants which have been struck from small slips taken from the mother plant (middle pot in the first photo above).  If you haven't tried it before, Chocolate Mint tastes exactly as it sounds - very chocolatey and it is a delicious addition to salads. Old pots from previous seedling purchases, a handful of potting mix, push in the slip, add water and there are 20 items for sale at one of my other daughters'  school fete for fundraising.

Growing herbs in pots and planters for easy use

By using your imagination to use the limited space you may have will provide many tasty and useful plants ready to harvest within a few paces of your kitchen.

I hope this inspires you to grow some fresh produce in your own gardens, no matter how small they may be.

Bye for now, 
Mike (Fi's Dad)

Monday, October 22, 2012

Girl's vintage bedroom suite (or should that be Sweet?)

I love this makeover - what a beautiful vintage set this is.

Lilyfield life Painted Furniture: A beautiful vintage upholstered bedroom set.

My dad and step mother are selling their house over looking the valley on the Macdonald river near Wisemans Ferry. They are moving to the Central Coast and as part of the move they are downsizing and culling. They asked if I wanted this beautiful vintage upholstered bedroom set.  I said "yes, please". 


Lilyfield life Painted Furniture: A beautiful vintage upholstered bedroom set.

This is one set I am tempted to keep.

Lilyfield life Painted Furniture: A beautiful vintage upholstered bedroom set.


It really needed painting as it was all discoloured, a bit chipped and the old glazing was a greenish colour and looked a bit funky (and not in a good way). Luckily the red velvet upholstery is in perfect condition so I decided not to touch it. And why would I, the red velvet colour is divine.


Initially I painted it all white but I felt it was just lacking something...


so I sent an email to my furniture painting buddies, Karen of Restyled Vintage and Sandy of Paint Me White asking:

a) leave as is - just white
b) antique glaze

c) antique with wax
d) distress? (not actually an option on this piece really)


Lilyfield life Painted Furniture: A beautiful vintage upholstered bedroom set.


After a few emails back and forward, Karen and I had the idea of painting a muted French putty on the ornate carvings. Once I'd done this though I didn't really like it - it just looked a bit too messy. So I then dry brushed some of the white paint over the putty coloured trim so it was very muted and I loved the end result. Very delicate trim but it adds some depth and dimension.  One of the best things about blogging has been the wonderful friends I've made. It's always good to talk to Sandy and Karen about paint, furniture, blogging and of course our families.

Speaking of family - here's my sweet daughter being my model.

Lilyfield life Painted Furniture: A beautiful vintage upholstered bedroom set.

Can you see how muted the trim is?  
It's very slight now but it just gives the whole set a little lift.

Lilyfield life Painted Furniture: A beautiful vintage upholstered bedroom set.


This set is for sale. My daughter really wanted it but it would mean painting her walls and new curtains and I'm not up for all that at the moment. Anyway I think she may grow out of this too quickly.  If it doesn't sell this week as a set, Sandy has already put her order in for the bench!


Have a great week. Pop back tomorrow as my Dad is blogging with some gardening tips.  BTW - Is anyone looking for a very affordable rural retreat close to Sydney?  Here's the link to my dad's house that is for sale near Wisemans Ferry. It's extremely peaceful out there.


Fiona xx


Lilyfield life Painted Furniture: A beautiful vintage upholstered bedroom set.
sharing at Homemakeronadime

Sunday, October 21, 2012

weekend roundup

We've had a busy but extremely lovely weekend. Phil was in Brisbane with a few mates for the Bledisloe so the kids and I have been out and about and enjoying Sydney.  We've been at little athletics in the heat, cooling down in our spa and having BBQ lunches,

collecting wild mulberries in the park


climbing trees


playing with my camera and lens  
I love that my 6 year old took this photo below.


walking the beaches in the late afternoon 


and dinner by the sea


and even some dancing


My daughter's flamenco concert was this afternoon. 
Such a sweet group of girls  and their lovely teacher who is expecting her first child soon. I hope she keeps teaching next year.


What have you been up to? 
I hope where ever you are and what ever you are doing that it's been a relaxing and enjoyable time

Fiona xx

Friday, October 19, 2012

Painted White French Provincial Mirror

I've been doing a lot of painting this week, amongst other things. A good part of running a business from home is it makes it easier to fit everything in. I've been recruiting for one of my clients and in between reviewing resumes, conducting phone interviews and culling people I've been whipping out the paint brush and slowly getting through the huge amount of furniture I have to paint at the moment.


This is the mirror from the bedroom suite I painted a few weeks ago. The bed, console and bedsides have all sold a while ago to different people and I was yet to get around to painting the mirror. I finally completed it this week. Initially I was painting it out on the BBQ table, but the sun was blinding me so I finished it off inside. I think next time I paint a mirror, I will cover the reflective part in newspaper.


The mirror is a lovely shape with ornate scrolly mouldings that I have lightly distressed to bring out the detail.  It's a very big mirror with a very solid mounting wire so can hang on the wall or be mounted above a sideboard or dressing table.  I think it would look fabulous over a fireplace or in a hallway. 


Whenever I paint mirrors or glass doors etc, I never tape but instead use a trick that was taught to me by a professional painter of just jumping right in and painting, being reasonably neat but not worrying if paint gets on the glass or mirror and then when the paint is all dry, I clean off the paint by using a razor blade very carefully but firmly to scrape off the paint but not scratch the glass. Every time though, when I do this scraping I kick myself for not using the tape method. One method is a hassle up front and one is a hassle at the end. Which way do you do?

This mirror sold last minute on Instagram within minutes of me posting a photo. How instant is our life now with social media? I have lots of other furniture coming up for sale so please keep checking back if you are in the market for anything.

Fiona xx


Thursday, October 18, 2012

Painting with Silver

I thought I'd try something a little different this week. My sister had given me a tin of Porters' Duchess Satin in a colour called French Silver. This paint is like molten metal. It is so beautiful! I thought I'd try it out on a side table for a a little sparkly glam!

Painting a side table with Porters Duchess Satin French Silver.

One of the features of Porters' Duchess Satin is obvious brush marks and they advise to paint in a "birds nest" fashion (so your brush marks cross over). This is very similar to how Annie Sloan paints with her Chalk Paint and it gives an old fashioned French look to furniture.  On this table the brush strokes bounce the reflected light around and makes the table very pretty and shiny.

Painting a side table with Porters Duchess Satin French Silver.

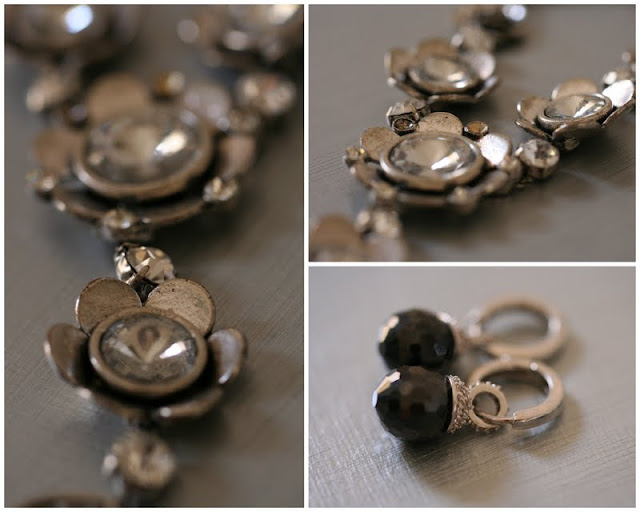
The tiny flowers are from the garden - they are so abundant this year and are all along the footpaths around here also. They are very sweet in my little dragonfly jug. I love this simple arrangement.  And a silver side table needs some bling so here is some of my jewellery. All sparkly and pretty. 

Painting a side table with Porters Duchess Satin French Silver.

Porter’s Duchess Satin is a pearlescent paint that can be used to decorate walls or furniture with the rich lustre of satin fabric.  I have seen it painted on walls in stripes with a matte paint as the other stripe and it looks fantastic.  For furniture it is much easier than using silver leaf but gives a similar effect - especially if you just used it for highlights (and not the whole table as I have done) 

Painting a side table with Porters Duchess Satin French Silver.

So what do you think?

My husband came home and said he hates it - 
"It's not your usual style, Fi". 

Umm... yeah babe that's the point. I was trying something new. 
I do think next time I would just use the silver as edging.

Fiona xx